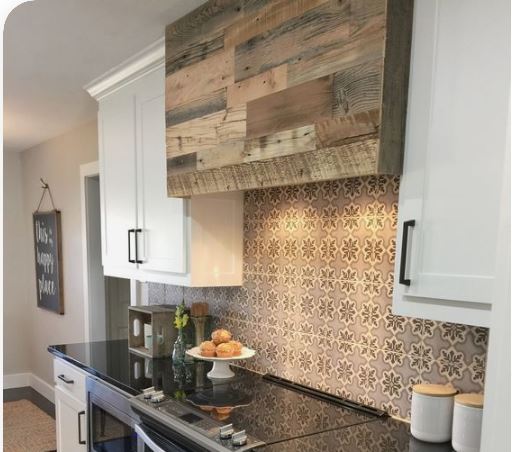
It was supposed to be a simple upgrade. Nothing dramatic. Nothing structural. Just a wood backsplash; something warm, elegant, and modern enough to transform an ordinary kitchen into something that felt like home.
Chioma had seen it online. Clean lines. Natural wood textures. That subtle rustic charm that made everything feel intentional. So she went ahead.
No permits, no written approval, just confidence. Two weeks later, her kitchen looked like something out of a magazine.
Four weeks later, she received a notice. Not a compliment. Not admiration.
A legal warning. Her landlord claimed she had made unauthorized alterations. The wood installation, he argued, violated both the lease agreement and building safety standards.
What followed wasn’t just a disagreement. It was a legal dispute that threatened her tenancy, her finances, and her peace of mind.
Why a Wood Backsplash Isn’t Just a Design Choice
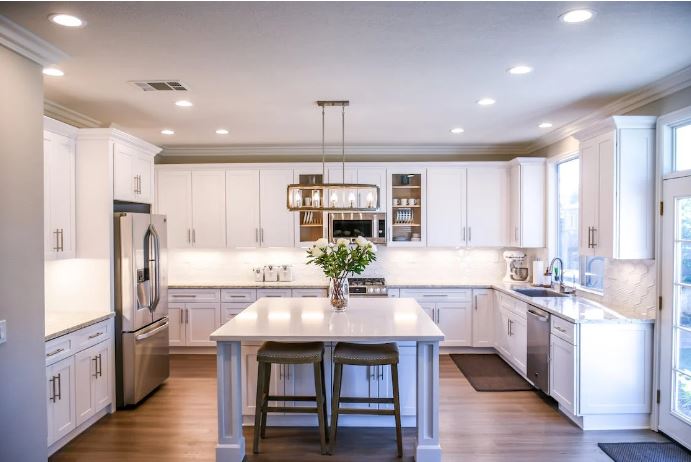
A backsplash is an important part of any kitchen. It can protect the walls from water, grease, and other messes, and it can also add style and personality to the space. A wood backsplash can play a significant role in enhancing the overall look and feel of a kitchen or any other space where it’s used.
Rustic elegance is a style that combines the warmth and charm of rustic elements with the clean lines and modern amenities of a contemporary kitchen. It is a popular choice for homeowners who want a kitchen, that is both stylish and inviting.
Wood backsplash can be important for aesthetics and functionality because wood is a warm and inviting material that adds a touch of natural beauty to any space. Its unique grain patterns and rich colors can create a visually appealing focal point in the room.
Here are some of the benefits of having a wood backsplash in your kitchen
- Protection: A backsplash can protect the walls from water, grease, and other messes that are common in the kitchen. This can help to keep your walls looking clean and fresh for longer.
- Style: A wood backsplash can add style and personality to your kitchen. There are many different materials and finishes to choose from, so you can find one that matches your style and décor.
- Functionality: A backsplash can also serve a functional purpose. For example, a tile or wood backsplash can be used as a place to hang utensils or spices.
- Increased value: A backsplash can also increase the value of your home. Studies have shown that homes with backsplashes sell for more money than homes without them.
If you are considering adding a backsplash to your kitchen, there are a few things you should keep in mind:
- The size of your kitchen: The size of your kitchen will determine the size of the backsplash. A small kitchen may only need a small backsplash, while a large kitchen may need a larger one.
- The style of your kitchen: The style of your kitchen will also influence the style of the backsplash. If you have a modern kitchen, you might choose a sleek, minimalist backsplash. If you have a traditional kitchen, you might choose a more ornate backsplash.
- Your budget: Backsplashes can range in price from a few hundred dollars to several thousand dollars. It is important to set a budget before you start shopping so that you do not overspend.
With so many benefits to consider, a backsplash is a great way to enhance the overall look of your kitchen. By choosing the right material, style, and size, you can create a backsplash that is both stylish and functional.
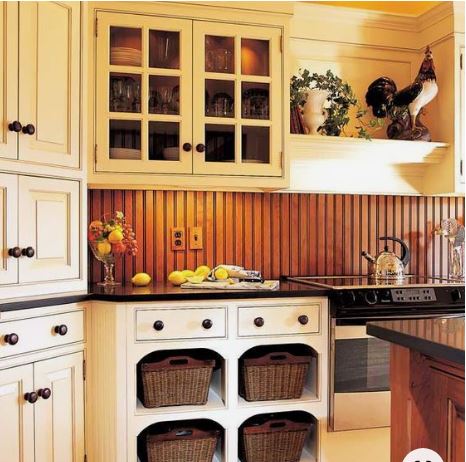
The different types of wood suitable for a rustic backsplash
Plywood: Plywood is a versatile and affordable option that is available in a variety of colors and finishes. It is also relatively easy to work with, making it a good choice for DIY projects.
Shiplap: Shiplap is a type of wood paneling that is characterized by its overlapping boards. It is a popular choice for rustic-style kitchens because it adds a touch of warmth and character.
Beadboard: Beadboard is another type of wood paneling that is characterized by its small, raised beads. It is a more traditional option than shiplap, but it can still be used to create a rustic look.
Barnwood: Barnwood is reclaimed wood that has been weathered and distressed. It is a unique and eye-catching option that can add a lot of character to a kitchen.
Reclaimed wood: Reclaimed wood is wood that has been used previously, such as in old barns or houses. It is a sustainable option that can add a touch of history to your kitchen.
The problems
There’s something deeply appealing about a wood backsplash. It softens the coldness of tiles and metals. It adds personality. It tells a story.
But here’s what most people don’t realize:
The moment you install a wood backsplash, you may be stepping into a legal gray zone.
Why This Happens
- It feels cosmetic, but isn’t always treated that way
A backsplash might seem decorative, but legally, it’s often considered a fixture; a permanent part of the property. - Wood introduces safety concerns
Unlike tiles or stainless steel, wood is:- Flammable
- Sensitive to moisture
- Subject to building code restrictions
- People assume “small change = no legal impact”
That assumption is where most problems begin.
The Real Risks Behind a Wood Backsplash
- Violation of lease agreements (for tenants)
- Non-compliance with building codes (for homeowners)
- Insurance complications if damage occurs
- Liability in case of fire or structural issues
- Forced removal or costly restoration
What looks like a design upgrade can quickly become a legal liability.
What the Law Says About Wood Backsplash Installations
Let’s simplify this. Because the law here isn’t complicated; it’s just often ignored.
1. A Wood Backsplash Can Be a “Fixture”
In legal terms, a fixture is something that:
- Is attached to the property
- Cannot be removed without causing damage
Most wood backsplash installations involve:
- Adhesives
- Nails or screws
- Sealants
That means:
It’s no longer “yours”, it becomes part of the property.
And once that happens, you’ve altered the property legally.
2. Tenants: Your Rights Are Limited
If you’re renting, here’s the hard truth:
You do not have the automatic right to install a wood backsplash.
Most lease agreements require:
- Prior written consent
- Approval for any permanent modification
Even if your landlord likes the result, the lack of permission can still be grounds for:
- Penalties
- Eviction
- Legal claims
3. Homeowners: Freedom Comes With Responsibility
Owning your home doesn’t mean unlimited freedom.
Installing a wood backsplash may require compliance with:
- Fire safety regulations
- Heat resistance standards (especially near stoves)
- Moisture protection rules
In many jurisdictions, wood near cooking areas must be:
- Properly treated
- Installed with protective barriers
Ignoring this can:
- Void insurance
- Create liability if an incident occurs
4. Building Codes: The Silent Enforcer
This is where most people are caught off guard.
Building regulations don’t care whether your change is “small.”
They care about:
- Safety
- Durability
- Compliance
A wood backsplash can raise red flags if:
- It’s too close to a heat source
- It lacks fire-resistant treatment
- It affects ventilation
And here’s the uncomfortable truth:
Non-compliance doesn’t always show immediately—but when it does, it’s expensive.
How to Install a Wood Backsplash Safely and Legally
You don’t have to abandon your dream kitchen. You just need to approach it intelligently.
1. Know Your Status First
Ask yourself:
- Am I a tenant or homeowner?
- Do I have full rights to modify this space?
Your answer determines everything.
2. Get Written Approval (If Renting)
Never rely on:
- Verbal conversations
- Assumptions
Instead:
- Send a detailed request
- Describe the materials and installation method
- Get documented consent
3. Choose the Right Materials
Not all wood is equal.
Look for:
- Heat-treated wood
- Fire-resistant finishes
- Moisture-resistant coatings
This isn’t just about durability; it’s about legal compliance.
4. Respect Safe Distances
Ensure your wood backsplash:
- Is not directly exposed to open flames
- Has protective barriers if near cooking zones
5. Hire Professionals (and Document Everything)
A qualified installer:
- Understands safety standards
- Reduces your legal risk
And most importantly:
- Use a written contract
6. Think About Reversibility
If needed, can you:
- Remove the backsplash?
- Restore the wall?
If not, you’re dealing with a permanent legal change.
What Most People Learn Too Late
Let’s be blunt.
This is where things go wrong.
“It Looked Safe to Me” Isn’t a Legal Defense
In legal disputes, intention doesn’t matter. Compliance does.
Your Landlord Doesn’t Have to Accept It
Even if your wood backsplash:
- Improves the kitchen
- Adds value
Your landlord can still demand:
- Removal
- Restoration at your cost
Insurance Can Turn Against You
If something goes wrongl say, fire damage:
- Insurers may refuse to pay
- You may be held fully liable
Especially if:
- The installation wasn’t compliant
Restoration Costs Are Often Worse
Removing a wood backsplash can:
- Damage walls
- Require repainting or reconstruction
And guess who pays? You.
A Wood Backsplash Is Not Just Design, It’s a Decision
Here’s the deeper truth most people miss:
Every design choice in your home carries a legal weight.
A wood backsplash is not just:
- Aesthetic
- Trendy
- Personal
It’s also:
- A structural modification
- A compliance issue
- A legal responsibility
When you understand this, something shifts. You stop guessing, and start deciding; with clarity.
When choosing wood for a rustic backsplash, it is important to consider the following factors:
- The style of your kitchen: The wood should complement the overall style of your kitchen. For example, if you have a traditional kitchen, you might choose a dark, stained wood. If you have a modern kitchen, you might choose a lighter, whitewashed wood.
- The size of your kitchen: The size of your kitchen will determine the size of the backsplash. A small kitchen may only need a small backsplash, while a large kitchen may need a larger one.
- The budget: Wood backsplashes can range in price from a few hundred dollars to several thousand dollars. It is important to set a budget before you start shopping so that you do not overspend.
- The maintenance requirements: Wood backsplashes require regular maintenance to prevent them from rotting or warping. You will need to seal the wood and clean it regularly.
With so many factors to consider, choosing wood for a rustic backsplash can be a daunting task. However, by taking the time to do your research and choose the right wood for your needs, you can create a backsplash that will add beauty and character to your kitchen for years to come.
Tips on selecting the best wood color and grain pattern for your kitchen
Selecting the best wood color and grain pattern for your kitchen is an important decision that can greatly impact the overall aesthetics of the space. It involves a balance between personal preference, practical considerations, and the overall design aesthetics of your home.
Take your time to explore options and choose a wood that complements your style and lifestyle. Take into account the existing color scheme and style of your kitchen. The wood color should complement and enhance the overall decor.
If you have light-colored cabinets and countertops, you might opt for a darker wood for contrast, or if your kitchen has a rustic theme, a distressed wood with visible knots and imperfections could be a good choice.
Think about your personal style and what appeals to you. Are you drawn to the warmth of rich, dark woods like mahogany or walnut, or do you prefer the light and airy feel of maple or oak? Your preferences should guide your decision.
Wood can have various grain patterns, such as straight, curly, wavy, or even irregular. Consider the level of grain pattern you desire. For a sleek and modern look, you might opt for a wood with a subtle grain, while a more pronounced grain pattern can add character and a rustic touch.
Here are some more tips to help you make the right choice:
Lighting Conditions: Keep in mind the natural and artificial lighting in your kitchen. Dark woods can absorb light and make a space feel cozier, while lighter woods can reflect light and create a brighter atmosphere. Choose a wood color that complements your lighting conditions.
Maintenance: Different wood species require different levels of maintenance. Some woods, like cherry or walnut, develop a beautiful patina over time but may require more upkeep, while others, like maple or oak, are known for their durability and ease of maintenance. Consider how much time and effort you’re willing to invest in upkeep.
Sample Swatches: It’s essential to obtain samples of the wood species and finishes you’re considering. Place them in your kitchen to see how they look in the actual lighting conditions and alongside your existing decor. This will help you visualize the final result.
Budget: The cost of wood can vary significantly based on the species and finish. Set a budget for your project and select a wood that not only fits your aesthetic preferences but also aligns with your financial constraints.
Durability: Kitchens are high-traffic areas with exposure to moisture, heat, and potential spills. Ensure that the wood you choose is suitable for kitchen use and can withstand these conditions. Applying a protective finish can also help enhance durability.
Consult with a Designer: If you’re unsure about which wood color and grain pattern would work best in your kitchen, consider consulting with a professional interior designer or kitchen specialist. They can provide expert advice and help you make an informed decision.
Installing the wood backsplash
Installing a wood backsplash can be a rewarding DIY project or something you hire a professional for. There are two main installation methods for wood backsplashes:
- Nail and glue: This is the most common method and is suitable for most types of wood backsplashes. The boards are nailed or screwed into the wall studs, and then construction adhesive is used to fill in the gaps and secure the boards in place.
- Beadboard or wainscoting panels: These panels are pre-cut to size and come with a tongue-and-groove joint that makes installation easy. The panels are attached to the wall with construction adhesive, and then finish nails are used to hold them in place until the adhesive sets.
Here are the steps involved in installing a wood backsplash using either method:
- Prepare the wall. The wall should be clean, dry, and free of any loose paint or wallpaper. If the wall is not level, you may need to install furring strips to level it out.
- Measure and cut the wood boards. The boards should be cut to the desired height and width. If you are using a nail and glue method, you will need to add an extra 1/2 inch to the width of each board to allow for the thickness of the nails or screws.
- Install the wood boards. If you are using a nail and glue method, start by nailing or screwing the boards into the wall studs at the bottom of the backsplash. Then, work your way up, nailing or screwing each board into the studs. Apply construction adhesive to the back of each board before nailing or screwing it in place. If you are using beadboard or wainscoting panels, simply attach the panels to the wall with construction adhesive.
- Fill in the gaps. Once all of the boards are in place, use construction adhesive to fill in any gaps between the boards.
- Sand and finish the wood. Once the adhesive is dry, sand the wood to smooth it out. Then, apply a finish of your choice to protect the wood.
Here are some additional tips for installing a wood backsplash:
- Use a level to make sure that the boards are installed straight.
- Leave a 1/4-inch gap between the top of the backsplash and the ceiling to allow for expansion and contraction.
- If you are using a nail and glue method, pre-drill the holes for the nails or screws to prevent the wood from splitting.
- Be careful not to over-tighten the nails or screws, as this can warp the wood.
With a little care and attention, you can install a beautiful and durable wood backsplash in your kitchen or bathroom.
Consider the importance of grout or caulk in finishing the backsplash
Grout and caulk are both important finishing materials for backsplashes. It is used to fill the joints between tiles, while caulk is used to seal the edges of the tiles and the wall.
Grout is a cementitious material that is mixed with water and sand. It is available in a variety of colors and finishes, and it can be used to create a seamless look between the tiles. Grout is also moisture-resistant, which is important for backsplashes in kitchens and bathrooms.
Caulk is a flexible material that is used to seal gaps and prevent water damage. It is also easy to apply and remove, which makes it a good choice for backsplashes that may need to be replaced or repaired in the future.
Here are some of the benefits of using grout and caulk in finishing a backsplash:
- Water resistance: Grout and caulk are both water-resistant, which is important for backsplashes in kitchens and bathrooms. This helps to prevent water damage to the wall and the tiles.
- Durability: Grout and caulk are both durable materials that can withstand the wear and tear of everyday use. This makes them a good choice for backsplashes that will be exposed to moisture, heat, and other elements.
- Aesthetics: Grout and caulk can be used to create a variety of looks, from a simple, seamless finish to a more decorative design. This makes them a versatile finishing material for backsplashes.
- Ease of application: Grout and caulk are both relatively easy to apply. This makes them a good choice for DIY projects.
If you are planning to install a backsplash, it is important to choose the right type of grout and caulk for the job. You should also follow the manufacturer’s instructions carefully to ensure a proper installation.
Wood backsplashes are a beautiful and stylish way to add warmth and character to your kitchen. They are available in a variety of woods, finishes, and styles to match any décor. Wood backsplashes are also relatively easy to install and maintain.
Style Without Awareness Is a Risk You Don’t See Coming
That wood backsplash? It can still be beautiful.
It can still transform your kitchen. But without legal awareness, it becomes something else entirely: a hidden risk waiting quietly behind elegance.
Because the truth is simple:
It’s not the upgrade that causes the problem
It’s the assumption that you’re allowed to make it.